Beauty · Beauty
Mastering Contour and Highlight: Tips for Perfect Application
Contouring and highlighting have become popular makeup techniques in recent years, thanks to the rise of social media and beauty influencers. These techniques involve using differe…
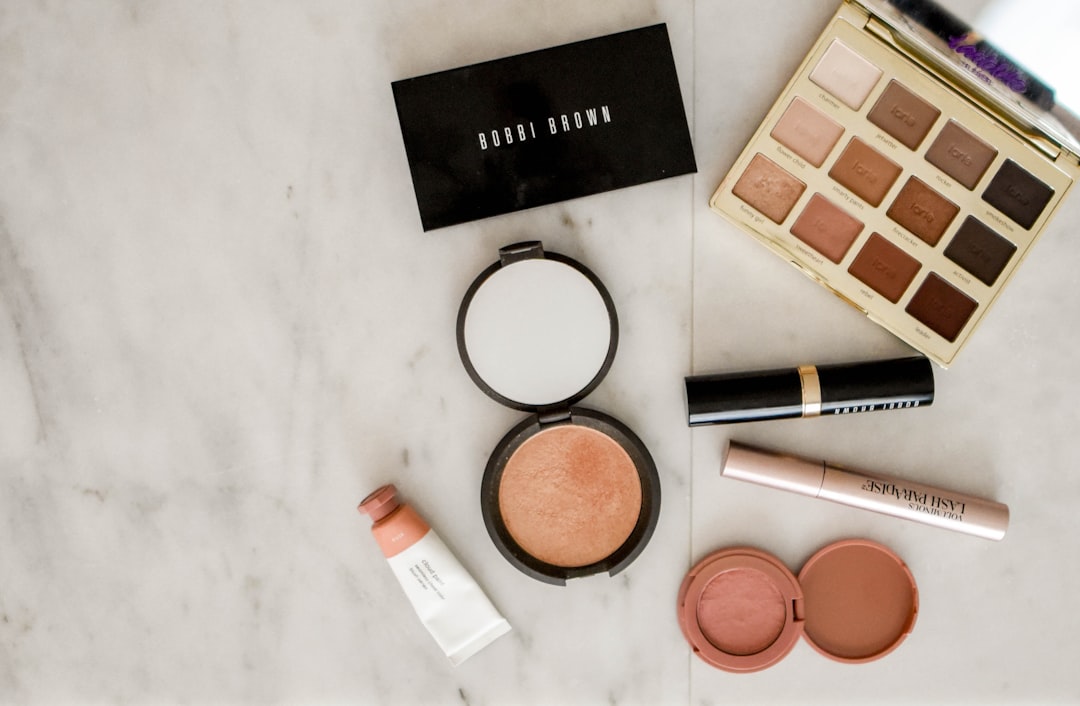
Contouring and highlighting have become popular makeup techniques in recent years, thanks to the rise of social media and beauty influencers. These techniques involve using different shades of makeup to sculpt and define the face, creating the illusion of higher cheekbones, a slimmer nose, and a more defined jawline. While contouring and highlighting may seem intimidating to beginners, understanding the basics is crucial for achieving a flawless look. In this article, we will explore the fundamentals of contouring and highlighting, including the tools needed, product selection, lighting considerations, face shape analysis, step-by-step instructions, blending techniques, common mistakes to avoid, tips for enhancing specific features, and tips for different skin tones.
Key Takeaways
- Contouring and highlighting can enhance your facial features and create a more defined look.
- Choosing the right products for your skin type is crucial for achieving a natural and flawless finish.
- Proper lighting is important for contouring and highlighting as it can affect the appearance of your makeup.
- Determining your face shape is essential for precise contouring and highlighting.
- Following a step-by-step guide and blending your makeup well can help you achieve a natural and polished look.
Understanding the Basics of Contour and Highlighting
Contouring involves using a darker shade of makeup to create shadows and define certain areas of the face, while highlighting uses a lighter shade to bring forward and accentuate specific features. The purpose of contouring is to create depth and dimension, while highlighting adds brightness and luminosity. By strategically placing these shades on the face, you can enhance your natural bone structure and create a more sculpted look.
To achieve a flawless contour and highlight, you will need a few essential tools. A contour brush with a small, angled head is ideal for precise application of the darker shade. A fluffy brush or fan brush works well for applying the lighter shade. Additionally, a beauty blender or makeup sponge is essential for blending and diffusing the product seamlessly into the skin.
Choosing the Right Products for Your Skin Type
Selecting the right products for your skin type is crucial for achieving a successful contour and highlight. For oily skin types, it is important to choose matte or oil-free products that will not add extra shine to the skin. Cream or powder-based products work well for oily skin as they provide long-lasting coverage without clogging pores.
For dry skin types, it is best to opt for cream-based products that will add moisture and hydration to the skin. Cream contour and highlight products blend seamlessly into dry skin, creating a natural and dewy finish.
When selecting shades for contouring and highlighting, it is important to choose colors that complement your skin tone. For contouring, choose a shade that is one to two shades darker than your natural skin tone. For highlighting, select a shade that is one to two shades lighter. It is also important to consider the undertones of your skin when choosing shades. Warm undertones should opt for contour shades with a hint of warmth, while cool undertones should choose cooler-toned contour shades.
The Importance of Proper Lighting for Contouring and Highlighting
Lighting plays a crucial role in how your contour and highlight appear on the face. Different lighting conditions can drastically change the appearance of your makeup, so it is important to consider this when applying your products.
The best lighting for contouring and highlighting is natural daylight. This type of lighting provides the most accurate representation of how your makeup will look in different environments. When applying your makeup, try to do so near a window or in a well-lit room to ensure you have enough light to see the true colors and blending of your products.
If natural daylight is not available, try to use a combination of warm and cool-toned lights to mimic natural lighting conditions. Avoid using fluorescent lighting as it can cast a blueish tint on the face, making it difficult to see the true colors of your makeup.
How to Determine Your Face Shape for Precise Contouring
Understanding your face shape is essential for precise contouring. Different face shapes require different contouring techniques to achieve the desired effect.
To determine your face shape, start by pulling your hair back away from your face and closely examine the outline of your face in the mirror. There are generally six main face shapes: oval, round, square, heart, diamond, and oblong.
For oval faces, contouring is not necessary as this face shape is already well-balanced. However, highlighting the high points of the face can add a subtle glow.
For round faces, contouring is used to create the illusion of more defined cheekbones and a slimmer face. Apply the contour shade along the hollows of the cheeks and blend upwards towards the temples.
For square faces, contouring is used to soften the angles of the face. Apply the contour shade along the jawline and temples to create a more rounded appearance.
For heart-shaped faces, contouring is used to balance out the wider forehead and narrower chin. Apply the contour shade along the temples and under the cheekbones to create a more harmonious look.
For diamond-shaped faces, contouring is used to soften the angles of the face. Apply the contour shade along the temples and under the cheekbones to create a more balanced appearance.
For oblong faces, contouring is used to add width and create a more balanced look. Apply the contour shade along the hairline and under the cheekbones to create the illusion of a shorter face.
Step-by-Step Guide to Contouring and Highlighting Your Face
Now that you understand your face shape and have selected the right products for your skin type, it’s time to dive into the step-by-step process of contouring and highlighting your face.
1. Start by applying your foundation or base makeup as usual. This will provide a smooth canvas for your contour and highlight.
2. Using a small, angled brush, apply the contour shade to the areas you want to define. This typically includes the hollows of the cheeks, temples, jawline, and sides of the nose. Remember to blend well using circular motions or upward strokes to avoid harsh lines.
3. Next, take your highlight shade and apply it to the high points of your face. This includes the tops of the cheekbones, bridge of the nose, brow bone, and cupid’s bow. Blend well to create a seamless transition between the contour and highlight shades.
4. To further enhance your contour and highlight, you can also use a bronzer to add warmth to the face. Apply the bronzer to the areas where the sun naturally hits, such as the forehead, temples, and tops of the cheekbones.
5. Finally, set your contour and highlight with a translucent powder to ensure long-lasting wear.
Tips for Blending Your Contour and Highlight for a Natural Look
Blending is key to achieving a natural-looking contour and highlight. Here are some tips for seamless blending:
1. Use a damp beauty blender or makeup sponge to blend the products into the skin. This will help create a more natural finish and prevent any harsh lines.
2. Start with a light hand and build up the intensity gradually. It is easier to add more product than to remove excess.
3. Use circular motions or upward strokes when blending to avoid any streaks or harsh lines.
4. Blend the contour shade towards the hairline and temples to create a more natural-looking shadow.
5. Use a clean brush or sponge to blend any harsh lines or edges.
Common Mistakes to Avoid When Contouring and Highlighting
Contouring and highlighting can be tricky, especially for beginners. Here are some common mistakes to avoid:
1. Using shades that are too dark or too light for your skin tone. This can create an unnatural or muddy appearance.
2. Applying too much product at once. Start with a light hand and build up gradually for a more natural look.
3. Neglecting to blend properly. Blending is key to achieving a seamless finish, so take your time and blend well.
4. Applying contour and highlight in the wrong areas. Understanding your face shape is crucial for precise application.
5. Using the wrong tools. Invest in good quality brushes and sponges to ensure a flawless application.
Using Contour and Highlight to Enhance Your Features
Contouring and highlighting can be used to enhance specific features of the face. Here are some tips for enhancing different areas:
1. Eyes: Apply a light shade of highlight to the inner corners of the eyes to make them appear brighter and more awake. You can also use a darker shade of contour in the crease of the eyelid to create depth and dimension.
2. Nose: Apply a thin line of contour shade on either side of the bridge of the nose to create the illusion of a slimmer nose. Blend well to avoid any harsh lines.
3. Cheeks: Apply the contour shade just below the cheekbones to create a more defined look. Use a light hand and blend well for a natural finish.
4. Jawline: Apply the contour shade along the jawline to create a more defined and sculpted look. Blend well to avoid any harsh lines.
Tips for Contouring and Highlighting Different Skin Tones
Contouring and highlighting can be adapted for different skin tones. Here are some tips for different skin tones:
1. Fair skin: Opt for contour shades that are cool-toned to avoid looking too orange or muddy. For highlighting, choose shades that have a subtle shimmer to add brightness to the skin.
2. Medium skin: Choose contour shades that have warm undertones to add warmth and dimension to the face. For highlighting, opt for shades that have a golden or champagne undertone.
3. Dark skin: Look for contour shades that are deep and rich in color to create definition on darker skin tones. For highlighting, choose shades that have a warm undertone to add brightness and luminosity.
How to Maintain Your Contour and Highlight Throughout the Day
To maintain your contour and highlight throughout the day, follow these tips:
1. Set your makeup with a setting spray to ensure long-lasting wear.
2. Avoid touching or rubbing your face throughout the day, as this can disrupt the placement of your contour and highlight.
3. Carry a touch-up kit with you, including a small brush or sponge and a compact powder for quick touch-ups.
4. Avoid excessive sweating or exposure to water, as this can cause your makeup to smudge or fade.
Contouring and highlighting are powerful techniques that can transform your face and enhance your natural features. By understanding the basics, selecting the right products, considering lighting conditions, analyzing your face shape, following step-by-step instructions, blending properly, avoiding common mistakes, enhancing specific features, adapting for different skin tones, and maintaining your makeup throughout the day, you can achieve a flawless contour and highlight that will leave you feeling confident and beautiful. So go ahead and give it a try, you might just discover a whole new level of makeup artistry!
More in
More from Beauty

Beauty · 25 min
Luxury Wellness & Longevity: The Complete Guide to Spas & Retreats
Discover the world’s best luxury wellness spas and longevity clinics, from Clinique La Prairie to SHA Wellness, with expert booking tips and bio…
Beauty · 32 min
Luxury Fragrances & Niche Perfumes: The Complete Guide
Explore luxury fragrances and niche perfumes: fragrance families, top houses like Creed, Byredo, Le Labo, Kilian, Roja, and how to choose and store yo…
Beauty · 16 min
The Science of Luxury Skincare: Ingredients, Treatments, and Routines That Actually Work
Why Luxury Skincare Is Different: and Worth It Walk into any high-end department store and the skincare section is overwhelming. Creams that cost mor…